Part five of my Converting WordPress to Web App series, as we convert this site from a standard WP website to a cache-enabled, offline-first, performance-optimized, installable Web App, that takes advantage of Build and Deployment processes, and sits safely revisioned in a Version Control repo.
The steps that I plan to take are listed below; each will become a link as I complete and publish that part of the series.
- Series Intro
- Adding Version Control
- Adding a Build Process
- Adding a Deployment Process
- Adding Caching and Offline Support (this post)
- Adding “Add to home screen” functionality
And now, on to…
Adding Caching and Offline Support
Rich offline experiences, periodic background syncs, push notifications— functionality that would normally require a native application—are coming to the web. Service workers provide the technical foundation that all these features will rely on.
– Introduction to Service Worker
Being able to cache assets to reduce HTTP Requests is big, but being able to offer your content offline, and even handle background updates and push notifications, is humongous! In fact, this allows a typical website to do something a lot of Native Apps don’t allow me to do: work offline!
I started collecting links to Service Worker resources, but then stumbled across these two from the changelog, which pretty much did that already:
- For the readers: Essential Reading List for Getting Started With Service Workers
- And the watchers: Must Watch Videos on Service Workers
The Service Worker code
This step was pretty easy because I basically just stole Jeremy Keith’s Service Worker implementation… I really like how he used multiple caches for URLs, pages and images, and how he implemented cache limits for pages and images.
All that said, I did make the following edits:
- I changed some of the variable names & values to reflect my site, plus added an initial cache-buster value of
'CACHE_BUSTER', which I will update programmatically in just a bit.var cacheStorage = 'atg.com', cacheBuster = 'CACHE_BUSTER', version = cacheStorage + '.' + cacheBuster, staticCacheName = version + '.static', pagesCacheName = version + '.pages', imagesCacheName = version + '.images'; - The function called during the
installevent (updateStaticCache) contains all of the files that I want to cache; naturally my list differs from Jeremy’s. Note my inclusion of mycacheBustervariable in my JS and CSS URLs. Also, following Jeremy’s example, I have created a custom Offline page, which I also cache for any pages that are not cached, to prevent the browser’s default “No Internet connection” page; a nice touch!// these can be cached at any time... cache.addAll([ '/about/', '/contact/', '/resume/', '/projects/' ]); // these must be cached for the Service Worker to complete installation return cache.addAll([ '/wp-content/themes/atg/scripts-min.'+cacheBuster+'.js', '/wp-content/themes/atg/styles-min.'+cacheBuster+'.css', '/', '/offline/' ]); - I also needed to prevent a few URLs from being cached (and thus being served from cache), essentially anything on the Admin-side; I lost a fair bit of work before I realized that I needed to do this…
if ( request.url.indexOf('/wp-admin') !== -1 || request.url.indexOf('/wp-includes') !== -1 || request.url.indexOf('preview=true') !== -1 ) {
    return;
}
With the Service Worker file created, I then needed to activate it; I added the following to my site’s scripts.js:
// check if Service Worker is supported
if ('serviceWorker' in navigator) {
    // register the Service Worker, must be in the root directory to have site-wide scope...
    navigator.serviceWorker.register('/serviceworker-min.js')
        .then(function(registration) {
            // registration succeeded :-)
            console.log('ServiceWorker registration succeeded, with this scope: ', registration.scope);
        }).catch(function(err) {
            // registration failed :-(
            console.log('ServiceWorker registration failed: ', err);
        });
}
Updating the Repo
With these two new files created, I needed to add them to my repo, and as I want my Build Process to minify them both, I added them to my /src/scripts directory.
I then added this block to my gulpfile.js:
gulp.task( 'scripts-serviceworker', function() {
    // grab all serviceworker js files
    return gulp.src( 'src/scripts/serviceworker*.js' )
        // check if source has changed since last build
        .pipe( plugins.changed( THEME_DIST_DIR ) )
        // concatenate files into a single files
        .pipe( plugins.concat( 'serviceworker-min.js' ) )
        // minify concatenated file
        .pipe( plugins.uglify() )
        // save files into root /dist directory for proper scope
        .pipe( gulp.dest( 'dist/' ) );
});
Note the * in the gulp.src. This is in case I ever add another component to the Service Worker, or decide to add a polyfill for something, and I am prepared for concatenation. Also note that I am putting the resulting, minified file into my repo’s root dist directory. Unfortunately, the file needs to reside there in order to have the entire site in its scope.
Updating the Cache-Buster
I mentioned above that I wanted to programmatically update the Service Worker cache-buster, and DeployBot provides a really slick way of doing that.
The configuration option that allows us to easily update the cache-buster string is called “Run shell commands after deployment”:
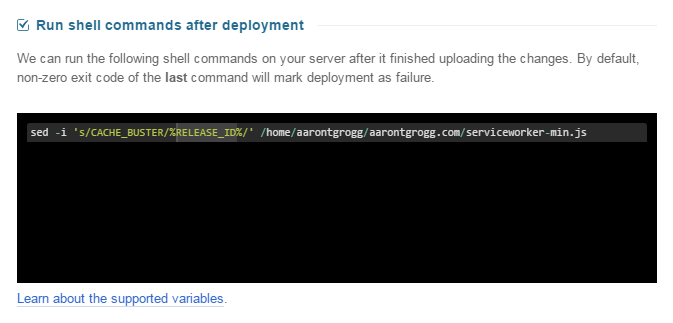
Note the link below the code box that opens a side panel displaying variables that you can use within your shell commands.
I wanted to use the 8-digit commit string, but the '%COMMIT%' variable outputs the same full commit string as the '%REVISION%' variable, which seemed excessive; instead I chose to use the '%RELEASE_ID%' variable, which is a “Unique ID for the triggered deployment.” Sounds like that will work quite nicely! It will mean that each deployment nullifies any cache that my users might have, but if I deployed again, I must have updated something, right?
Now, after completing a deployment, DeployBot grabs my serviceworker-min.js file and replaces my placeholder 'CACHE_BUSTER' string with the unique '%RELEASE_ID%' string!
Almost Home…
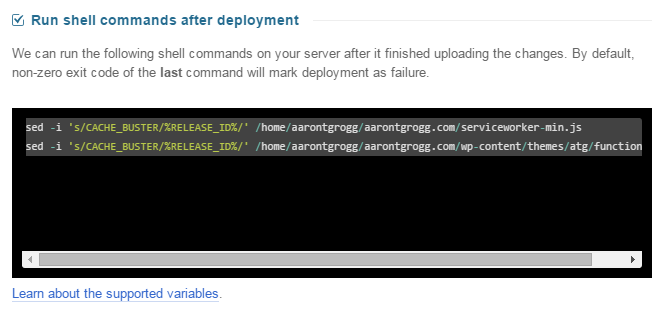
However, since the '%RELEASE_ID%' string will never match the really clever Last-Modified date cache-buster that I implemented some time ago, that means that the URLs that are cached by my Service Worker will never match the URLs in my markup, meaning the whole cache-thing breaks…
So, quick patch: I created another 'CACHE_BUSTER' placeholder in my theme’s functions.php file and will have DeployBot update that string as well; the updated “Run shell commands after deployment” code block:
Voila!
And with that, I have a working Service Worker that, in supporting browsers, caches a preset collection of files, including a custom Offline page, allowing my users to visit any of those pages while offline, and improves performance even when the user is online.
And for non-supporting browsers? Everything is exactly like it was before I started this week’s endeavor. (Okay, these users do download the Service Worker registration code that is now in my scripts.js file, which they will never use, but I think that’s a pretty small price for them to pay, for the benefit of so many others.)
Status Thus Far
This week’s installment certainly provides a major boost to the power of any site! The reduced HTTP Requests and the offline capabilities are awesome additions!
But one thing I do not like about this set-up is the “static” list of assets that I have to maintain; I do not like that I have to manually tell the Service Worker what to cache for me.
For this simple blog site, it isn’t so hard, but if I ran an online news site, I might want my readers to be able to open the home page each morning and have all of today’s front-page stories and their respective assets get cached so they could reliably read them on their way to work, regardless of their connectivity. But this would require manual updates to the serviceworker.js cache list every time a new story gets published… Pretty unrealistic.
Ideally I would have a script, either in my serviceworker.js, or in my PHP, that tracks the articles and their assets, then pulls them in and caches them, automagically… Something for “phase 2”, I guess… :-)
For now, as always, you can see where we are thus far by checking out the repo on GitHub. Since this will be my working repo for this entire conversion process, the repo will continue to change as this series progresses. So if you are reading this much later than it was written, it may not look the way it seems it should; just keep pushing through and eventually it will!
Next Up
Next up I will be Adding “Add to home screen” functionality. This feature is certainly not necessary for every project, it is kind of useless on non-mobile devices, and it will not even work on all mobile devices, it is a cool feature that might impress your boss or some client, so I thought it would be cool to add to the series. Also, when coupled with push notifications, it takes your web app even one step closer to looking and feeling like a Native App!
There really isn’t much to this step, but if you are “playing along at home”, you may want to check-out these articles:
Okay, that should be it!
Until then, happy Web Apping,
Atg
Wow very complete tutorial, i was about to start a project, and your article bring me the light, thank you very much for share this!
Great to hear, thanks for the kind words!
Looks simple, I’m going to implement it on a woocommerce based store. Stack is Nginx+FastCGI Cache+Redis+PHPOPcache+MariaDB. I’ve a doubt – I update product prices from time to time, will they be shown fresh when user loads the product next time.
Anything that you cache, will not be fetched from the browser until you clear the cache.
In the above example, triggering a new build should resolve the problem.
And please note that this will also clear any CSS and/or JS cache.
Cheers, and good luck!